Alicorns Pony Land Crafting and Exploration Guide
Walk the map, gather resources, craft rarer pieces, and feed your customize loop.
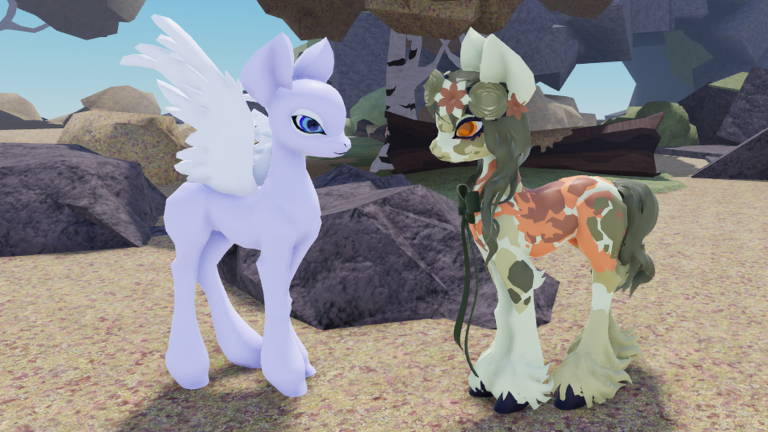
Exploration and crafting keep Alicorns! Pony Land [BETA] from becoming a pure dress-up menu. Official framing highlights exploring the world, gathering and crafting rare items, collecting accessories and hats, and using flowers as resources that feed dyeing and creativity. This guide turns those systems into a repeatable session loop: landmarks to learn, inventory habits that prevent clutter, and craft choices that actually improve your saves.
If you are brand new, skim Getting Started first. For flower-focused routes, keep Flowers and Resources open beside this page — flowers are a primary resource fantasy in Pony Land, and this guide zooms out to the wider explore-and-craft picture.
The explore → gather → craft → customize loop
A healthy session looks like a circuit, not a single stuck activity:
- Explore — walk landmarks, note gather nodes, meet players, learn safe paths.
- Gather — pick flowers and other world resources without overfilling bags.
- Craft — convert bulk materials into rarer wearables, dyes, or upgrade pieces.
- Customize / dye — apply results to a save slot; see How to Customize and Dye Items.
- Return to the world — test the look socially, then gather again with a clearer shopping list.
This loop also supports leveling toward Alicorn around level 50. Pair progress tracking with the Leveling Guide so fashion and XP move together.
Learning the map and landmarks
Do not treat the world as a loading screen between customize visits. Spend your first few hours building a mental map:
- Spawn and social plazas where players emote and show looks
- Flower fields and repeatable gather clusters
- Crafting or station areas if the BETA exposes dedicated interactables
- Scenic overlooks that are good for screenshots after a fashion win
- Quiet corners for RP scenes away from traffic
Walk the same loop twice on purpose. Second passes reveal nodes you missed while distracted by chat. When BETA patches rearrange spawns, re-walk after reading Updates instead of assuming your old path is optimal forever.
Landmarks also hide accessory and hat opportunities. World collection is a stated feature — see Accessories and Hats for equip and layering advice once a wearable drops.
Gathering without chaos
Gathering fails when inventory becomes a junk drawer. Rules that help:
- Pick a target craft before you leave spawn (for example: dye materials for a mint mane, or parts toward a floral hat).
- Cap yourself — leave when the bag is heavy enough to craft, not when every node on the map is empty.
- Separate “fuel” (flowers and bulk resources) from “keepers” (unique wearables).
- Craft or store before logging out so tomorrow’s you is not sorting trash.
Flowers deserve special attention because they feed dyeing and broader resource needs. Detailed node habits live on Flowers and Resources; use that page when your craft fails for missing botanicals.
If a gather spot feels contested, rotate to another landmark instead of standing still. Variety keeps XP and materials flowing and reduces social friction in a family-friendly RP game.
Crafting rare items on purpose
Crafting shines when it answers a fashion problem. Before you hit craft:
- Name the save slot that will receive the result.
- Confirm you are not about to overwrite a unique material you still need for dyes.
- Prefer one strong rare piece over three mediocre duplicates.
- Check whether the output is species-agnostic or looks better on Unicorn, Pegasus, or Earth pony silhouettes.
Rare crafts often become hero accessories. Equip them late in a customize session, test animations, and dye them toward your palette rather than leaving factory colors. That pipeline — craft → dye → place → save — is how exploration pays off visually.
When recipes confuse you after a patch, trust the live UI and patch notes. Early access means costs and outputs can shift; avoid third-party “guaranteed rare” scripts. Safety context belongs on Scripts, not in your crafting HUD.
Inventory habits that scale to Alicorn
Long campaigns toward level ~50 create inventory sprawl. Adopt habits early:
- Weekly purge of bulk leftovers after major crafts
- Mental tags: dye fuel / craft parts / showcase wearable / vendor fodder if trading exists
- Screenshot inventory before big crafts so you can reverse-plan next gather
- Keep slot 1 fashion independent from unfinished craft projects on slot 3
Players who only hoard never see their rare items in public. Equip, dye, and show — then gather again with taste refined by real feedback.
Feeding customize and dye loops
Exploration is not separate from fashion; it is the supply chain.
- Low on color options → flower and resource run → Dye Items
- Flat silhouette → craft or find an accessory → Accessories and Hats
- Bored of your look → explore a new landmark for inspiration, then customize with fresh materials
- Approaching Alicorn → keep crafting practice so horn-plus-wings rebuilds have a stocked wardrobe
Use the Customization Checklist after a big haul to apply materials systematically instead of panic-equipping everything.
Session templates
Short session (20–30 minutes)
- Claim any time-gated basics.
- Run one compact flower/resource loop.
- Craft a single targeted item or dye batch.
- Apply to slot 3, promote if it wins.
- Log out with a cleaner bag than you started.
Standard session (45–60 minutes)
- Social warm-up and emote check in plaza.
- Full landmark circuit with notes on new nodes.
- Craft two outcomes: one wearable, one dye project.
- Deep customize pass on one species save.
- Screenshot and optional share; skim Updates if the client feels different.
Progress session (leveling focus)
Combine the standard loop with intentional XP variety from the Leveling Guide: explore, gather, craft, socialize, repeat. Avoid empty standing AFK — it teaches nothing and risks account policies depending on platform rules.
Common exploration mistakes
- Customizing for an hour with zero materials, then wondering why dyes stall
- Picking every flower without a craft goal
- Ignoring accessories that drop because “I only care about mane”
- Never re-learning the map after BETA patches
- Using executors to auto-farm nodes — read Scripts and stay legitimate
How this pairs with other guides
| Goal | Open next |
|---|---|
| Flower routes and resource types | Flowers and Resources |
| Recolor workflow | Dye Items |
| Equipping world hats | Accessories and Hats |
| XP toward Alicorn | Leveling Guide |
| Day-one orientation | Getting Started |
Exploration and crafting are how Pony Land stays alive between fashion screenshots. Learn the landmarks, gather with intent, craft for a named save slot, and let every walk across the BETA world make your pony more interesting.
Frequently Asked Questions
Quick answers to the most common questions.
What should I craft first as a new player?
Craft toward an immediate fashion need — dye materials or a simple wearable for slot 1 — instead of hoarding rare recipes you cannot equip yet.
How do flowers fit into crafting and exploration?
Flowers are a core gatherable that feed resources and dyeing. Use the Flowers and Resources guide for routes, then return here for the wider craft loop.
Does exploring help me unlock Alicorn?
Legitimate play loops — explore, gather, craft, customize, socialize — support leveling toward the roughly level 50 Alicorn unlock. See the Leveling Guide for session structure.
Why is my inventory always full?
Gather with a craft target, convert bulk into finished pieces, and purge leftovers weekly. Do not end sessions on unsorted bags.
Can scripts gather or craft for me safely?
No safe recommendation. Auto-farm tools risk your Roblox account and save slots. Stay on legitimate loops; read the Scripts hub for risk context only.